Cover photo: WordPress
WordPress is a free and open-source content management system tool that millions of people use to create websites, whether they are for news, blogs, or even to sell goods.
Around 820 million websites use WordPress, which is roughly 43% of all sites in the world calculated in 1.98 billion and counting.
Although the tool is quite simple, it poses a challenge if you’re not familiar with it. However, with the right guidance, you can publish your articles and make them interesting for your readers.
I must confess I struggled at first, but after a few tutorials, I reckon I’m good enough. Albeit not the best, I keep on learning.
Today, I will show you how to publish a blog post using WordPress, add a featured image, insert photos, headlines and subheadings, plus the final touches.
Let’s knuckle down to it.
Step 1 – WordPress Account
Once you’ve written your article on Microsoft Word, Apple Pages, or Google Documents, enter to your WordPress account.

Step 2 – New Post
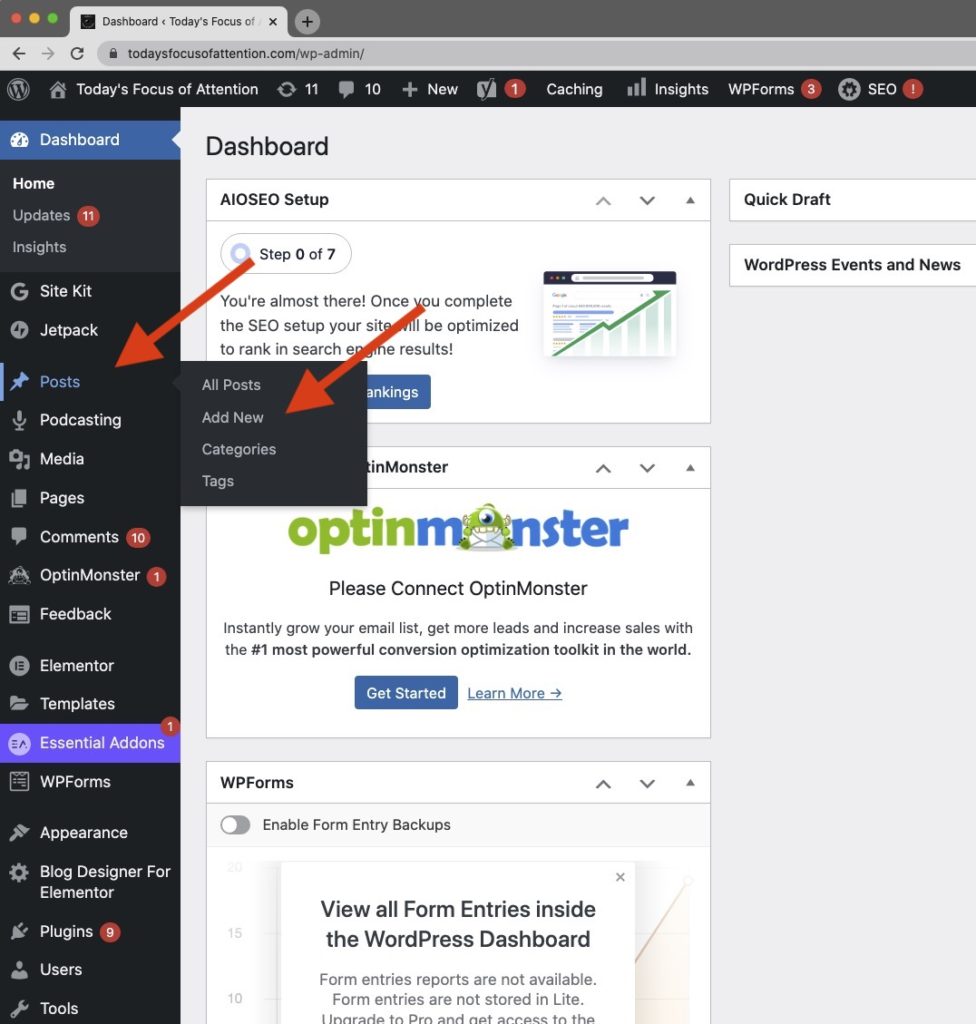
On the left side, go to ‘Posts’ – ‘Add New’
Step 3 – Headline
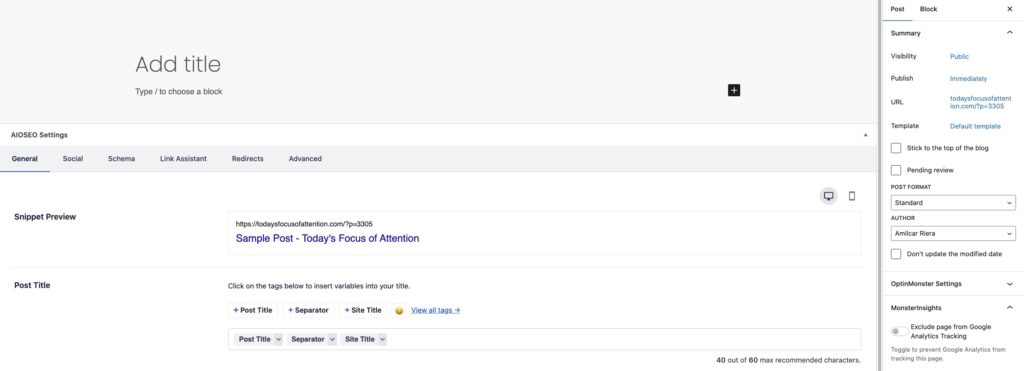
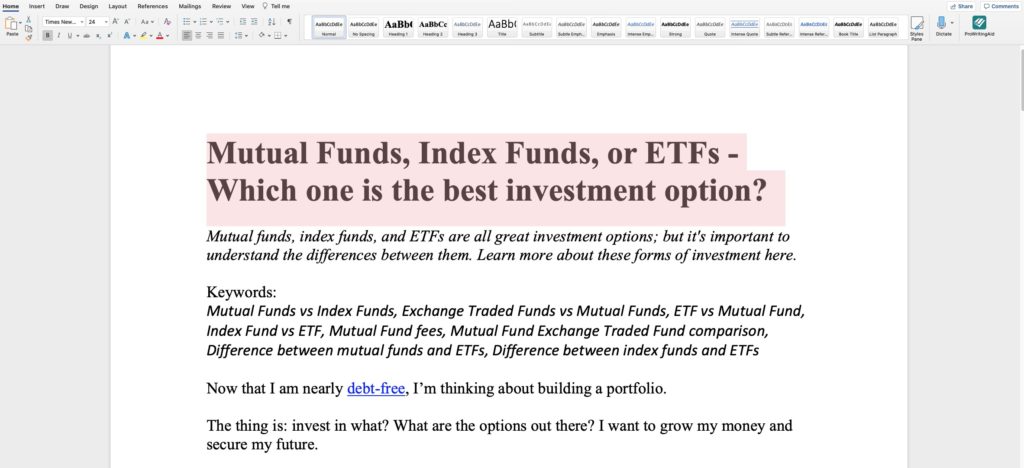
Copy your title and paste it.

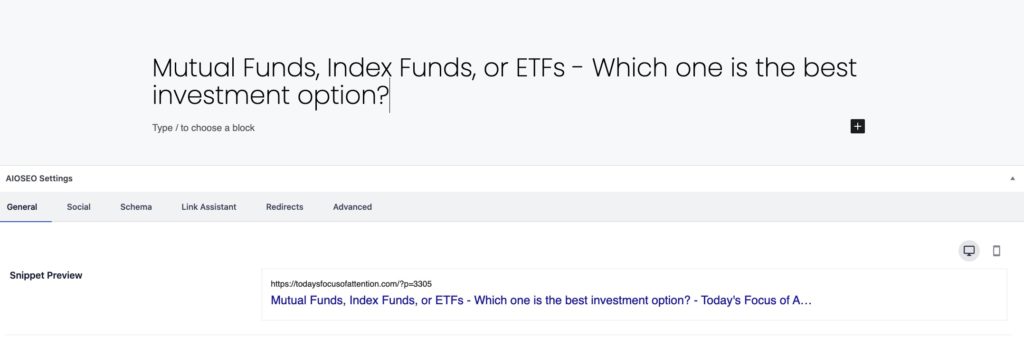
Step 4 – Content
Copy and paste the content of your post.
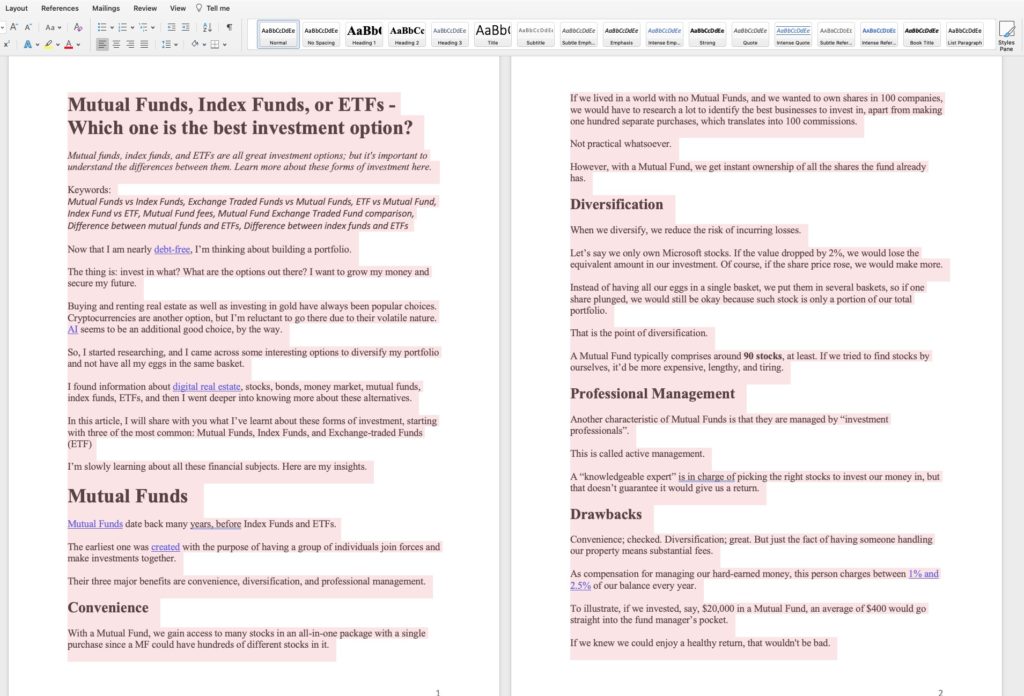
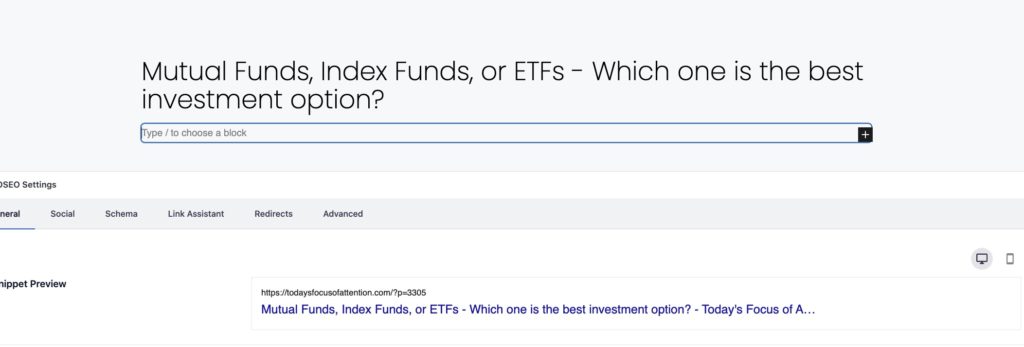
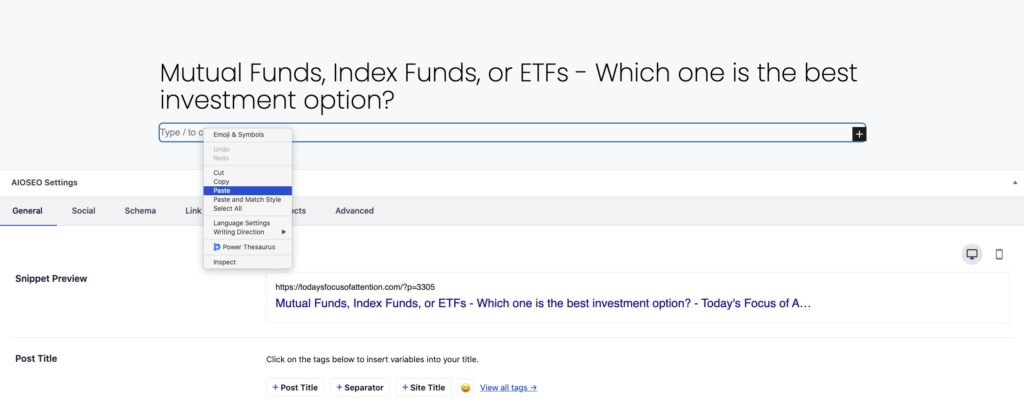

Note that every paragraph in your document is a block in WordPress.
Step 5 – Heading and Subheadings
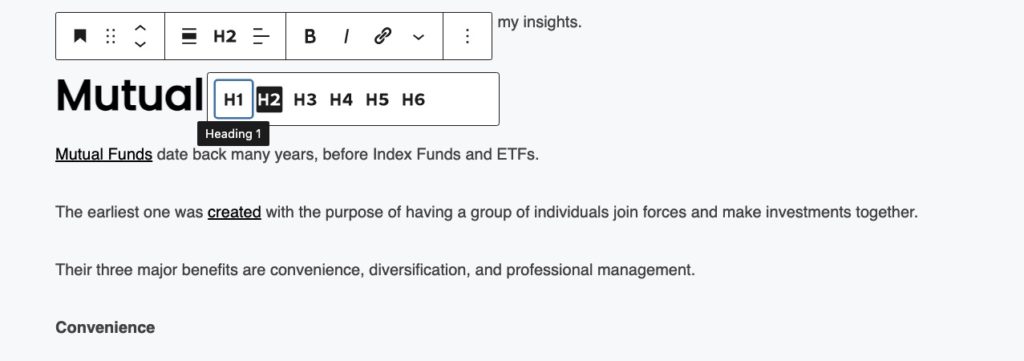
Optimise your heading and subheadings with H1, H2, H3, or H4 tags. They are important because they help your reader clearly identify each section of your article.
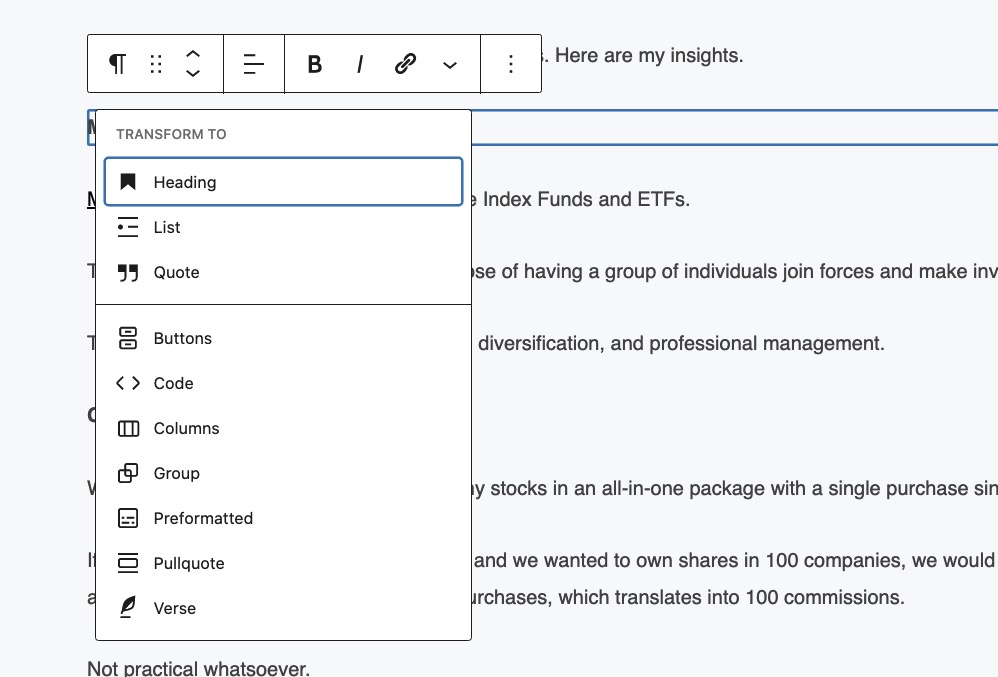
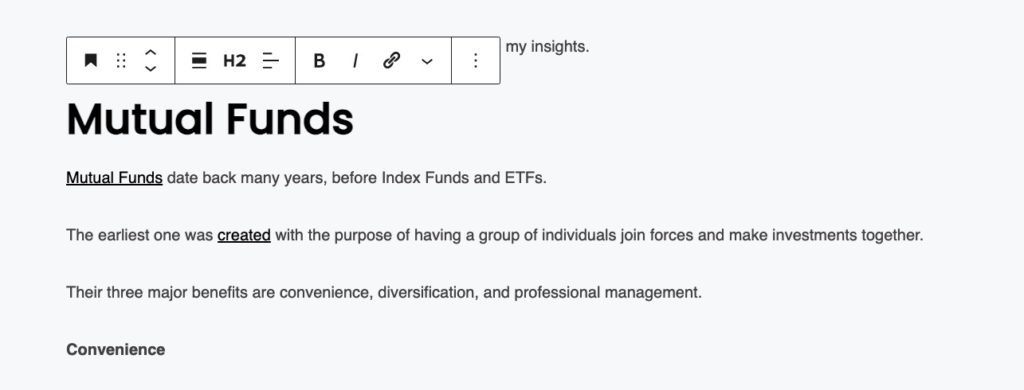
Click on the block you wish to change, then ‘Paragraph’, and ‘Heading’. It automatically turns into an H2 tag. However, you can restyle to H1, H3, or any other later on.
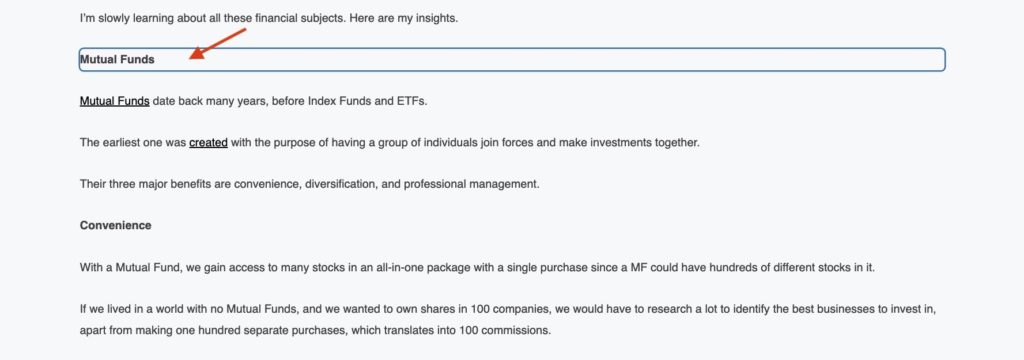
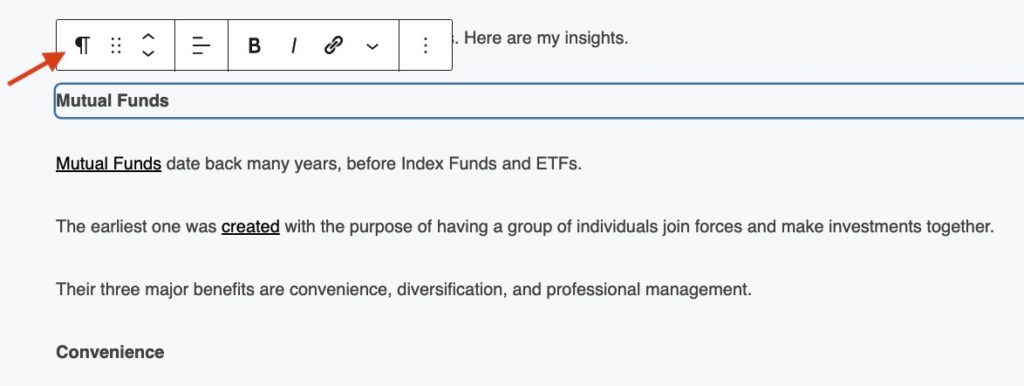
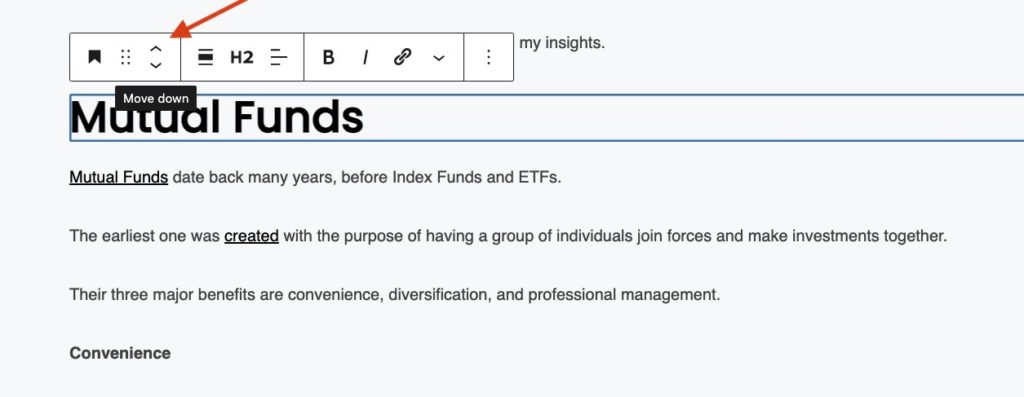
The arrows move the block up or down.
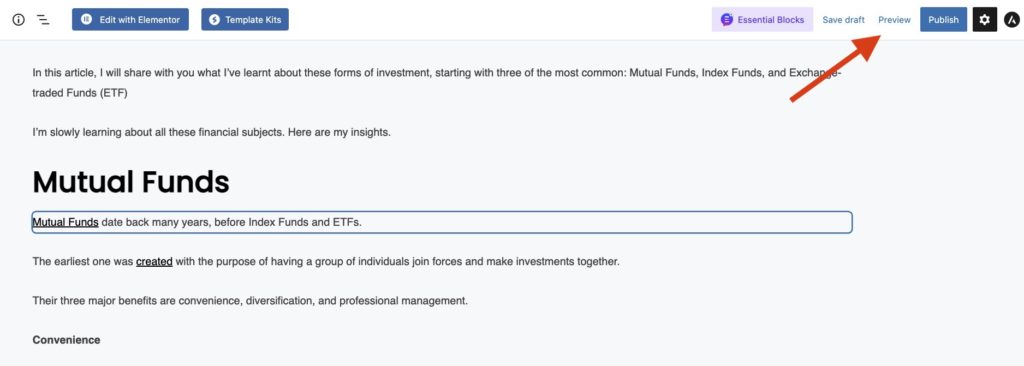
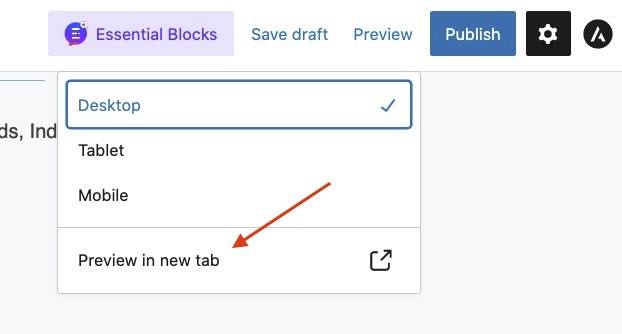
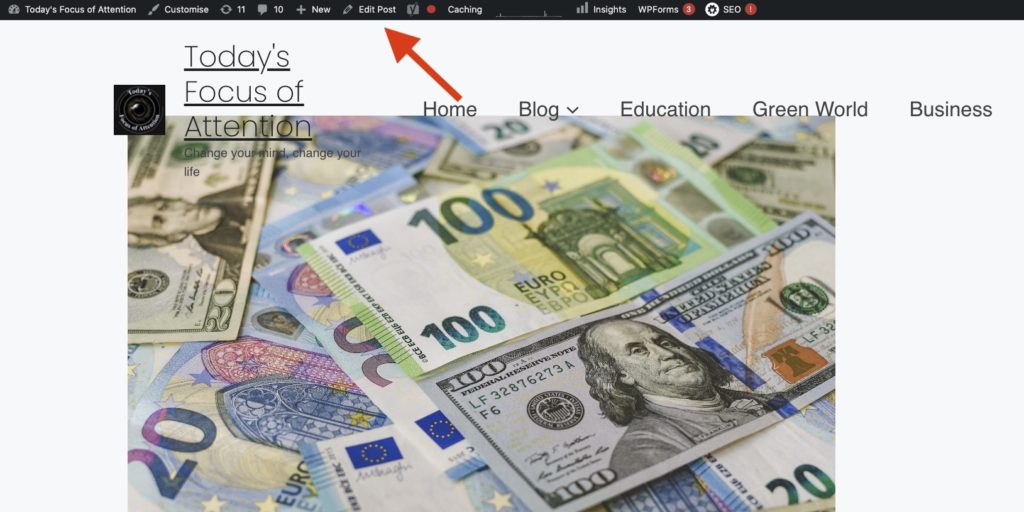
To see how everything is going, press ‘Preview.’ To continue editing, click ‘Edit Post’ or simply close the tab.

Step 6 – Separator / Spacer
This is a personal choice. I like each part of my articles to be well defined, so I space each of them.
How to Do It?
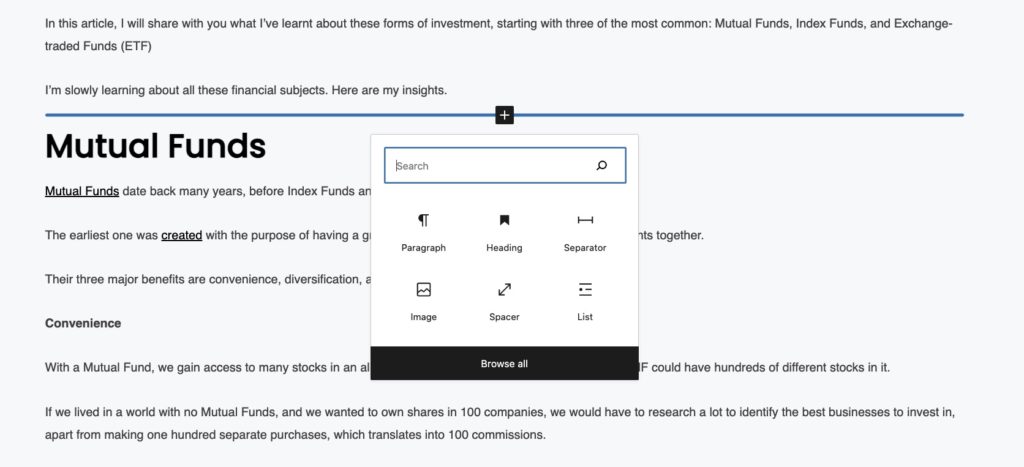
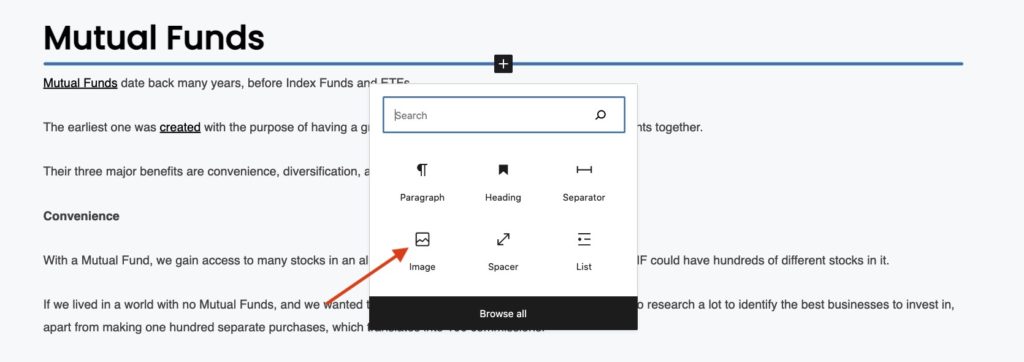
Place your cursor between blocks, wait for the sign ‘Add Block’, and hit the ‘Plus’ symbol.

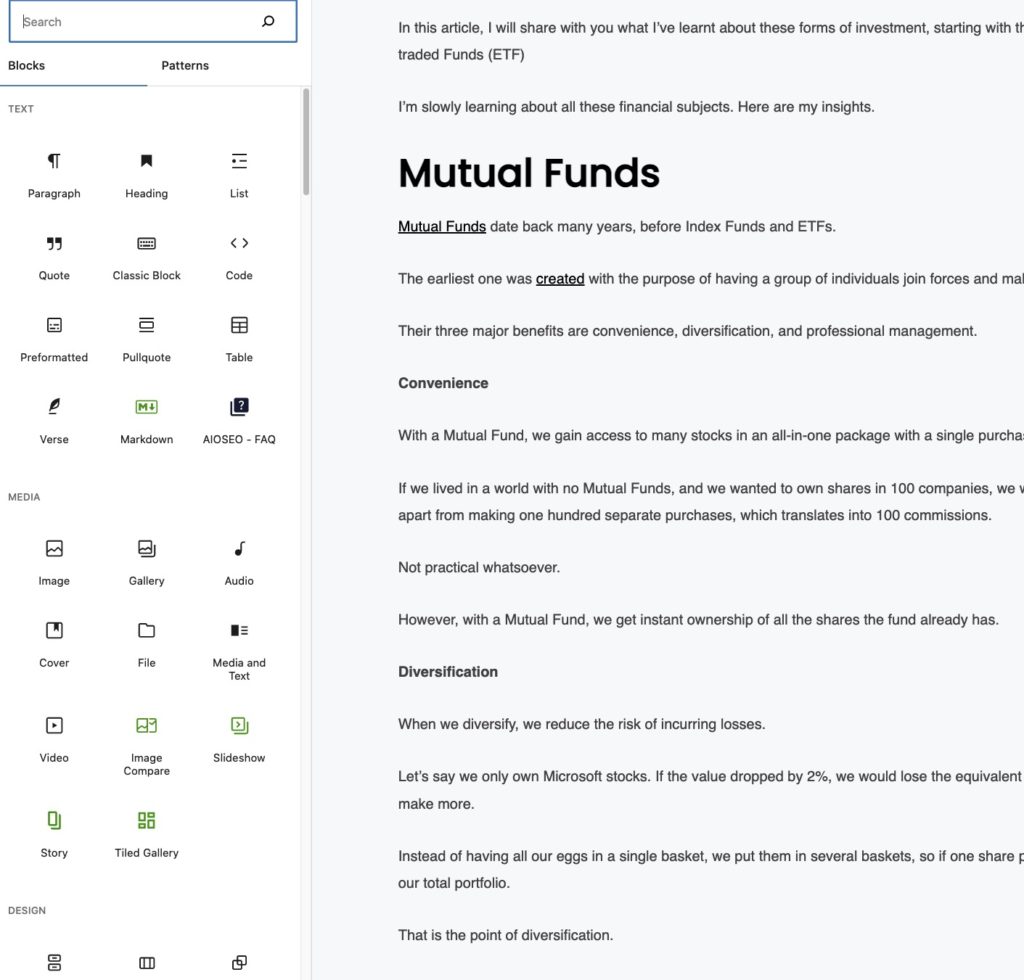
Paragraph, Spacer, Heading, Image, and List pop up. Clicking ‘Browse All’ displays all the available options. They are all great. Explore and experiment with them.
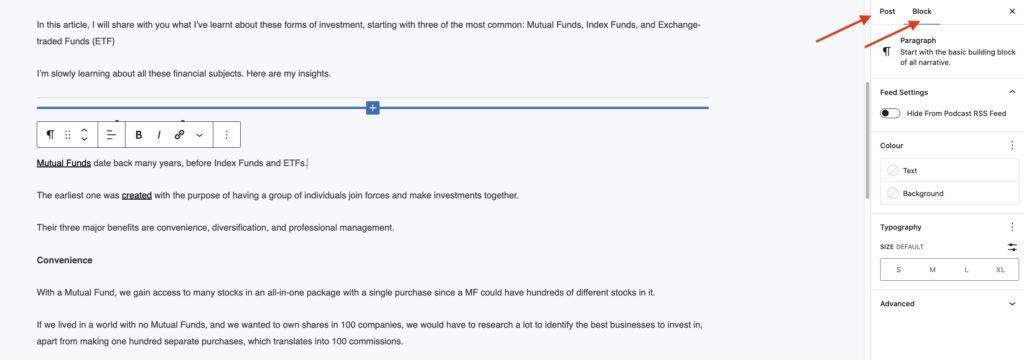
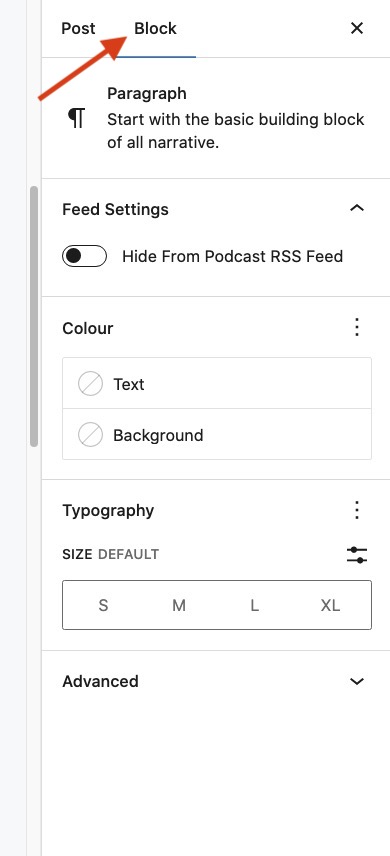
Each time you select any item, notice on the right side of your screen its settings.

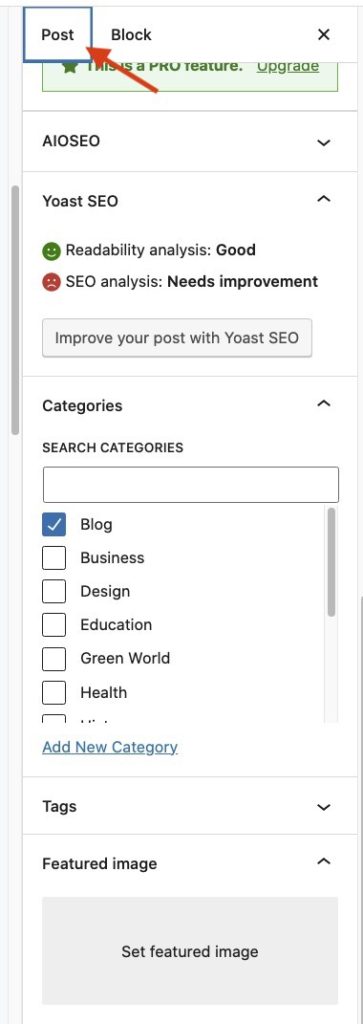
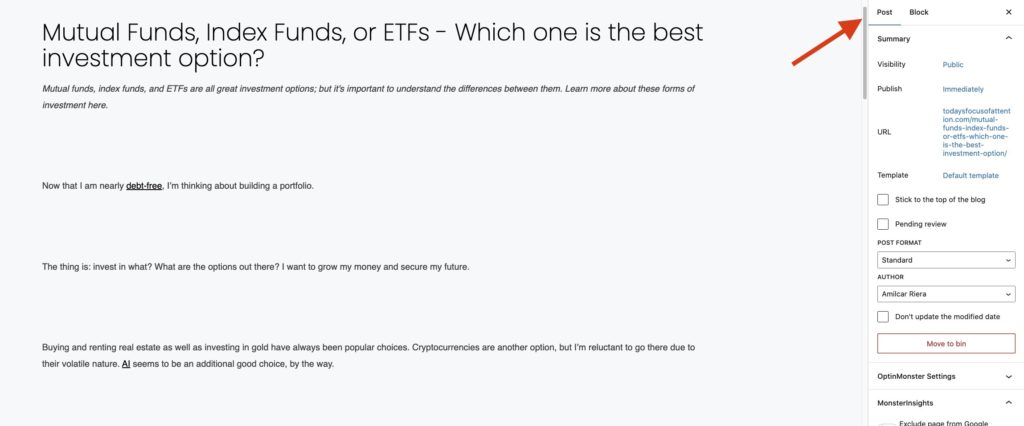
‘Post’ is for the entire article; ‘Block’ is for any block you’ve selected; and the same holds true for everything, whether it is a separator, photo, spacer, paragraph, word, or phrase.
Step 7 – Images
Put your cursor between blocks, wait for the + sign, and click on ‘Add Block’ – ‘Image’.
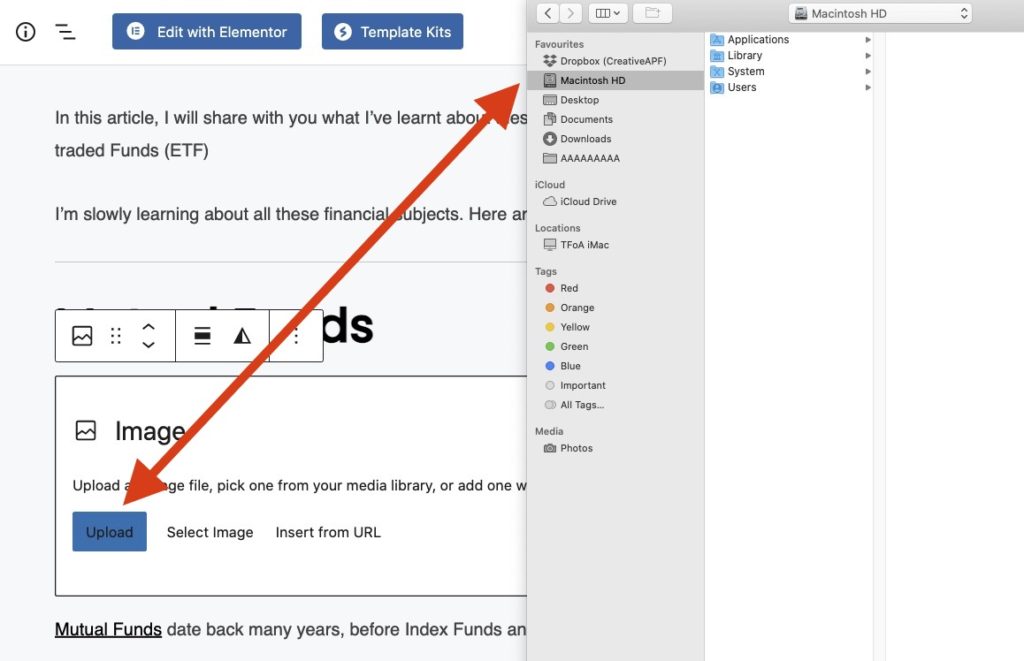
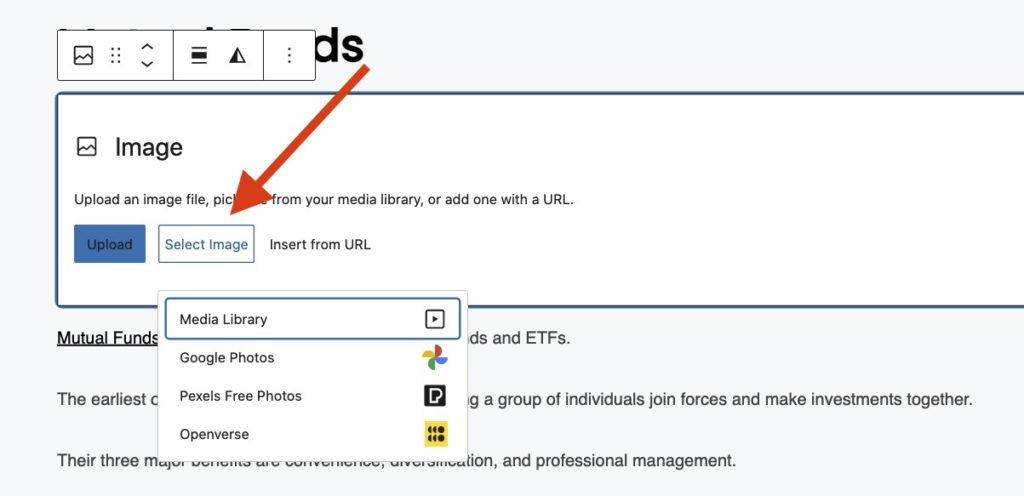
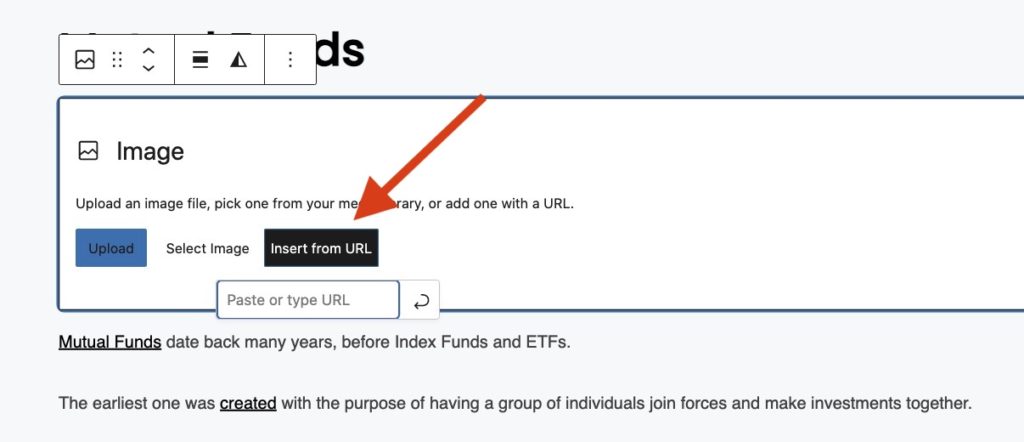
Drag and drop any photo from Finder (in the case of Mac users), ‘Upload’, or ‘Select Image.’

‘Upload’ allows you to import an image from your computer; ‘Select Image’ opens other options such as ‘Media Library’ (images you already have on WordPress), ‘Google Photos,’ ‘Pexels Free Photos’, or ‘Openverse,’ while ‘Insert from URL’ is to paste the link of the photo.
You can use any gallery of your preference, such as ‘Shutterstock.’ My top picks are ‘Pixabay’ and ‘Unsplash.’
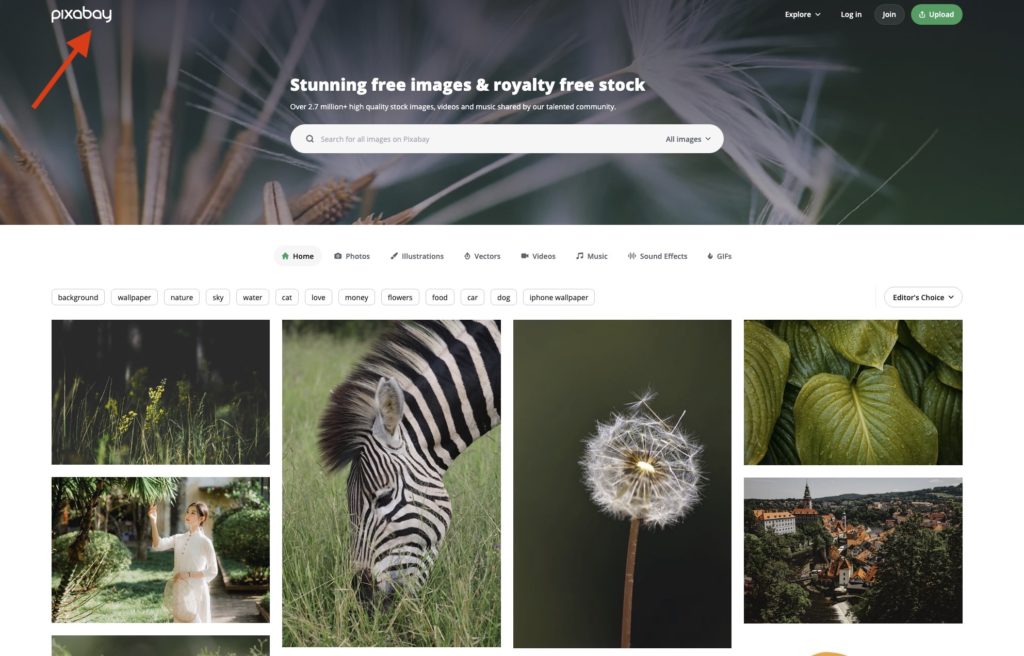
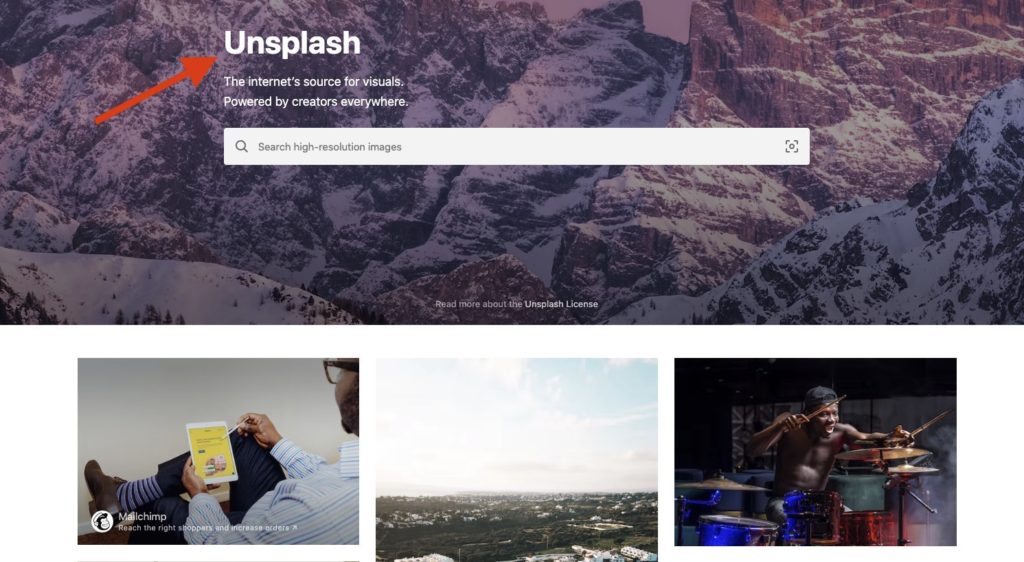
Whatever the source, don’t forget to give credit to the creator.
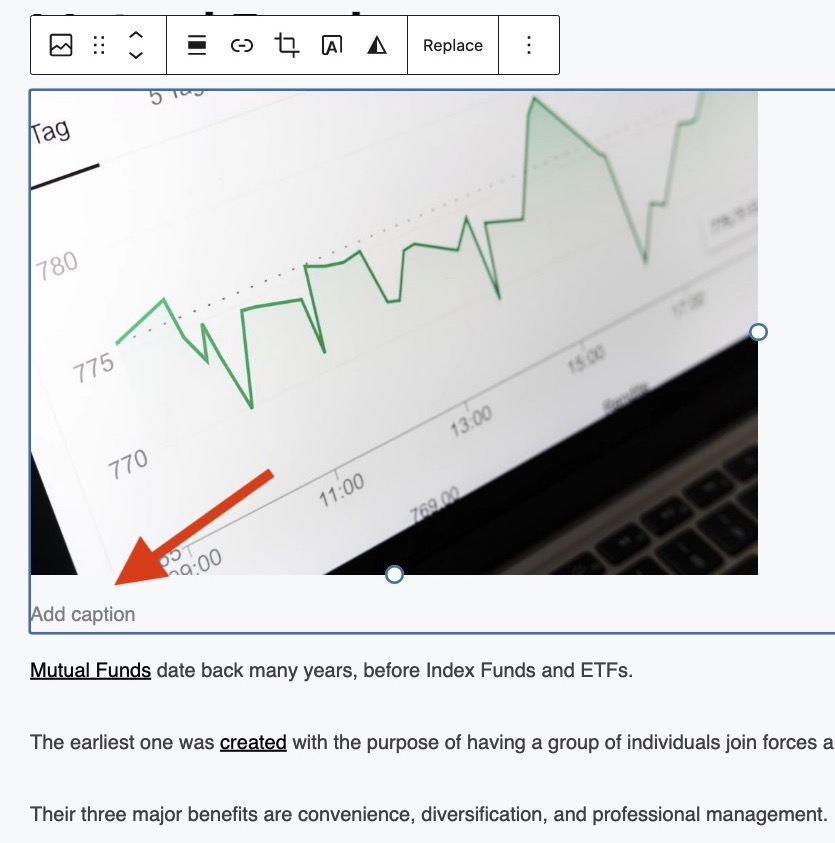
Click on the image, and on ‘Add caption,’ paste the link or the name of the author.
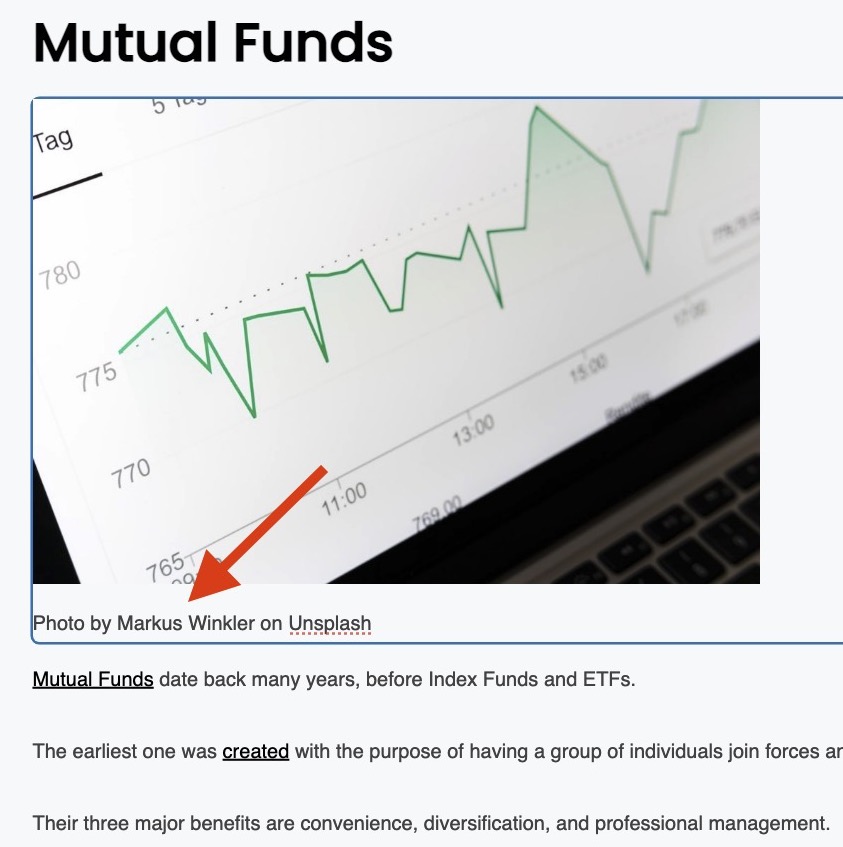
Step 8 – Alt Text
I suggest you type an alternative text when you upload a photo.
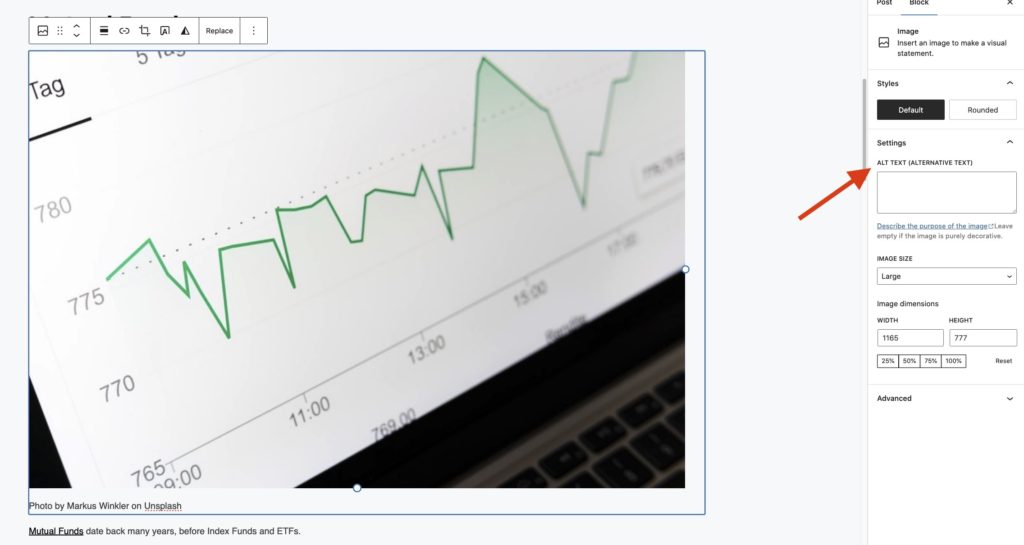
Step 9 – Separate Blocks
After the headline, subheadings, photos, separators, spacers, and alt texts, I recommend a double space between each block.
Why? It makes the article more visually attractive. Otherwise, you will have a messy wall of text, and for some people, it is not magnetic. But beauty is in the eye of the beholder.
How to Separate The Blocks?
Go to the end of each block, hit ‘Return’ (or Enter) followed by ‘Shift Enter.’ Another way to distance blocks is by adding a separator (Step 6).
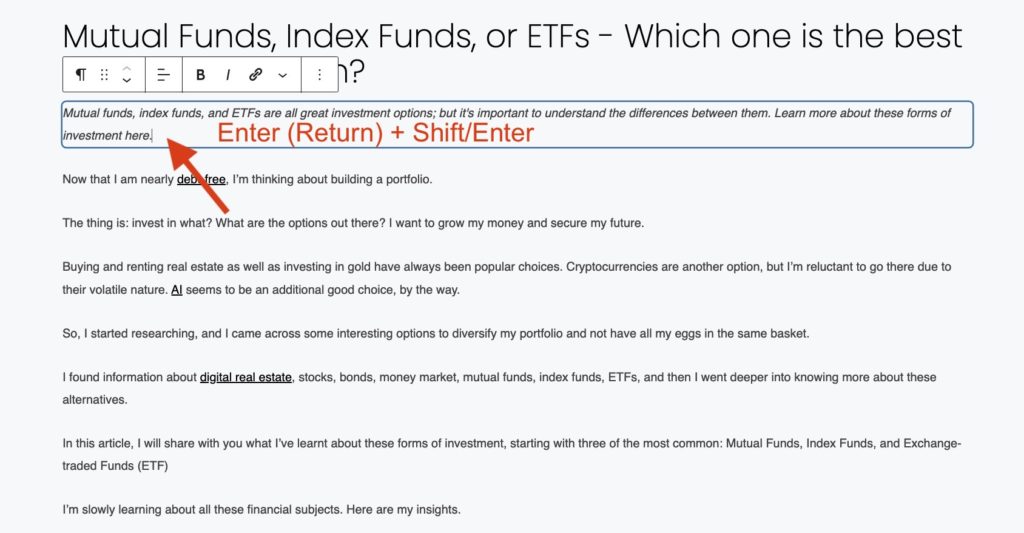
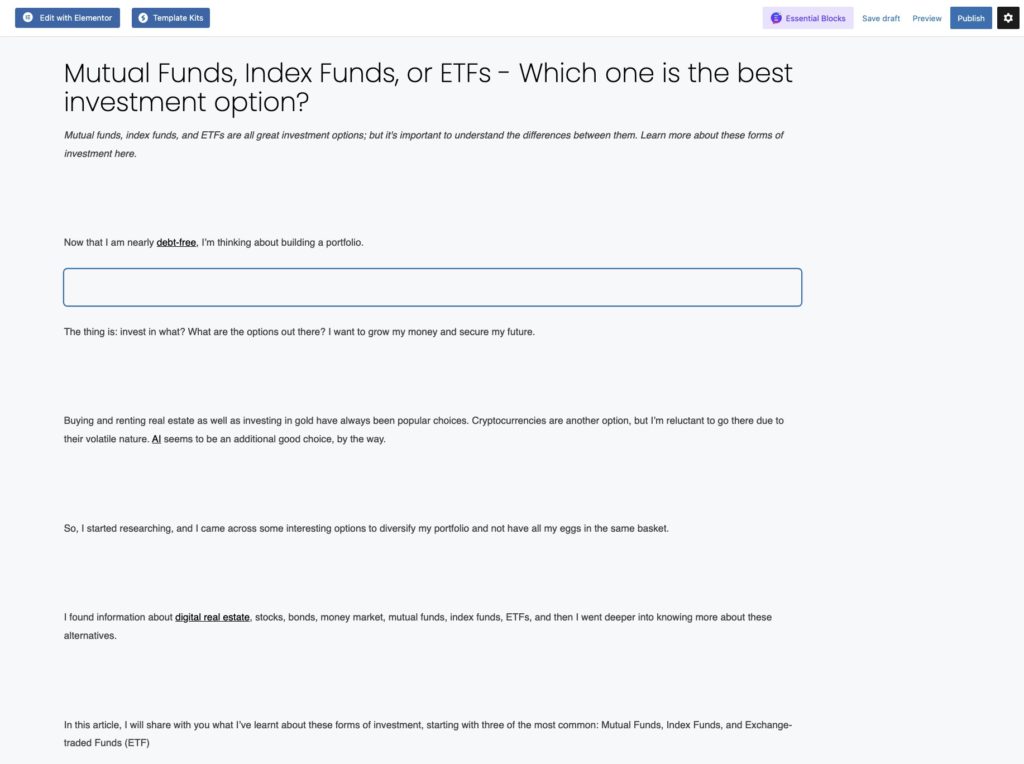
To get a glimpse, ‘Preview’, and if you don’t like it, just cut it out.


Step 10 – Featured Image
This is the cover photo.
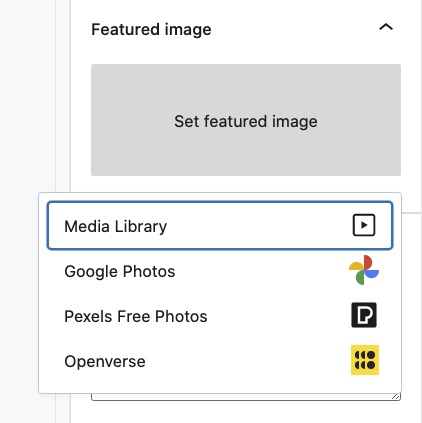
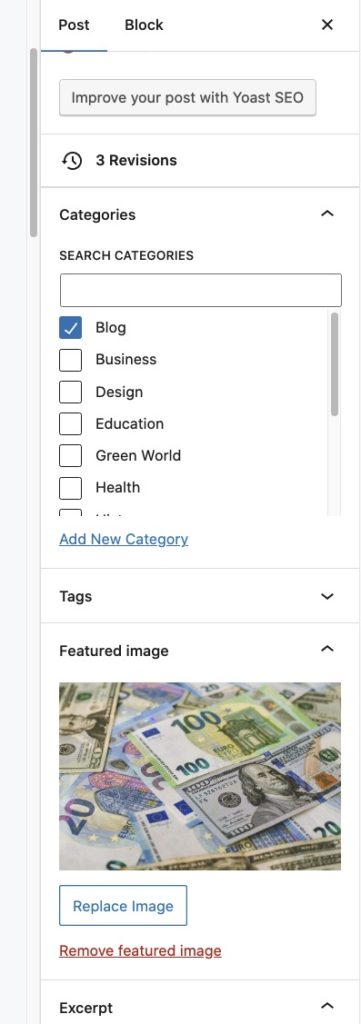
On the ‘Post’ tab, scroll down to ‘Featured Image.’ Click to go to either ‘Media Library,’ ‘Google Photos,’ ‘Pexels Free Photos,’ or ‘Openverse.’

For this step-by-step guide, I’ll use ‘Media Library,’ ‘Upload Files.’
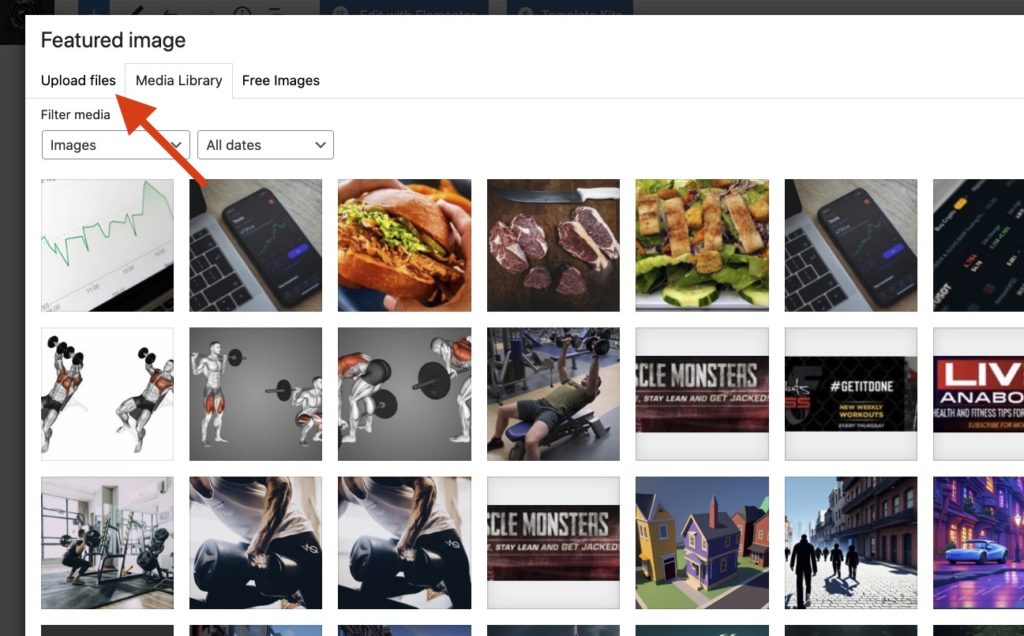
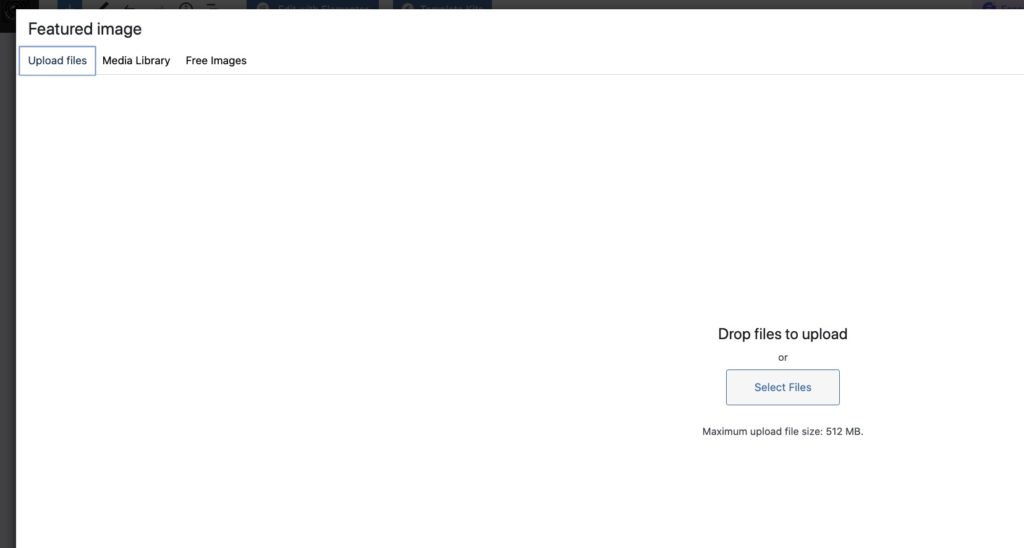
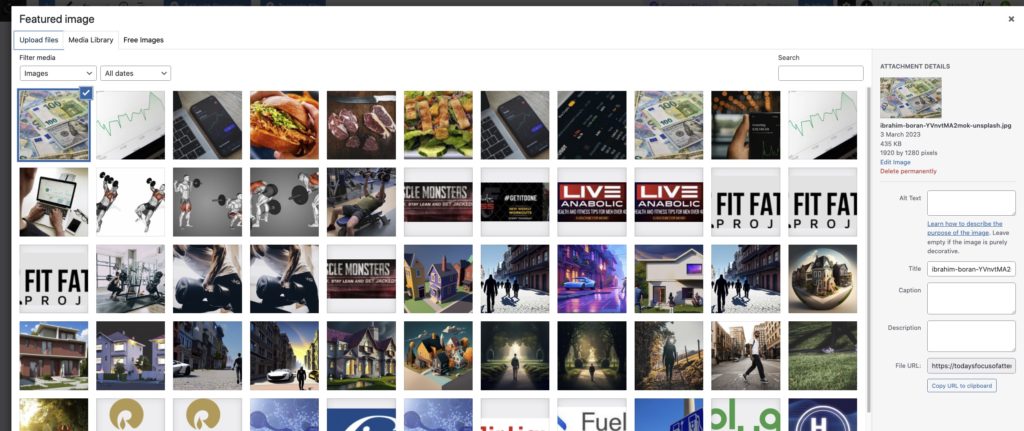
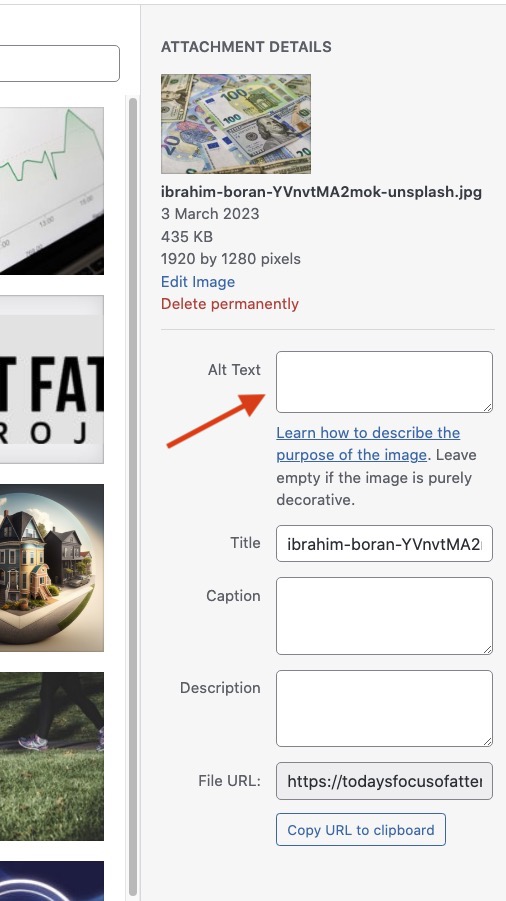
On the right side, you have ‘Alt text’. Write the alternative text, along with the author’s name in ‘Title,’ and if you want ‘Caption’, and ‘Description.’

After that, ‘Set Featured Image.’

Step 11 – Category
Choose the category for your article. For this guide, I will pick ‘Business.’
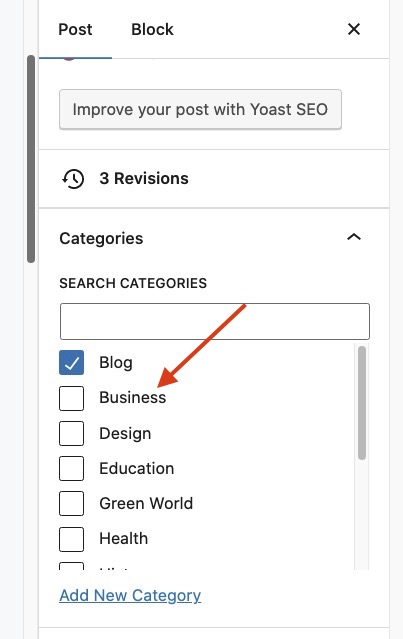
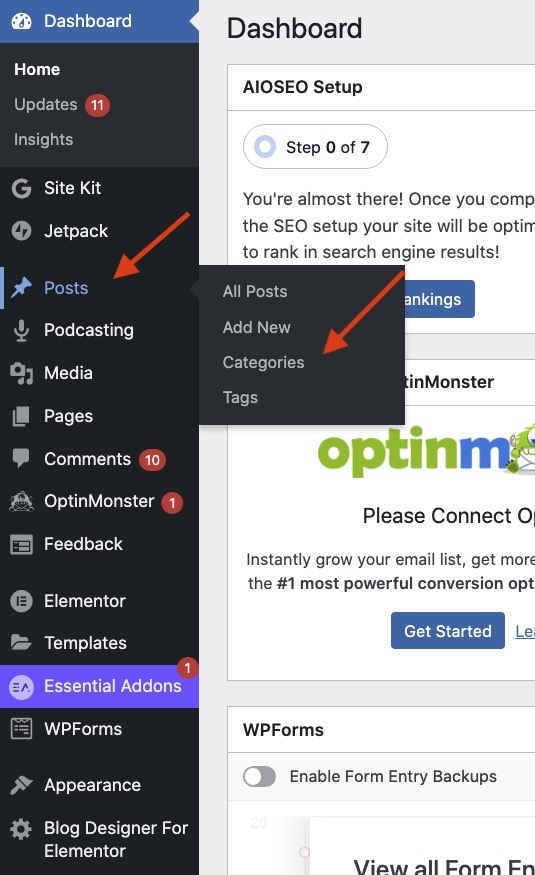
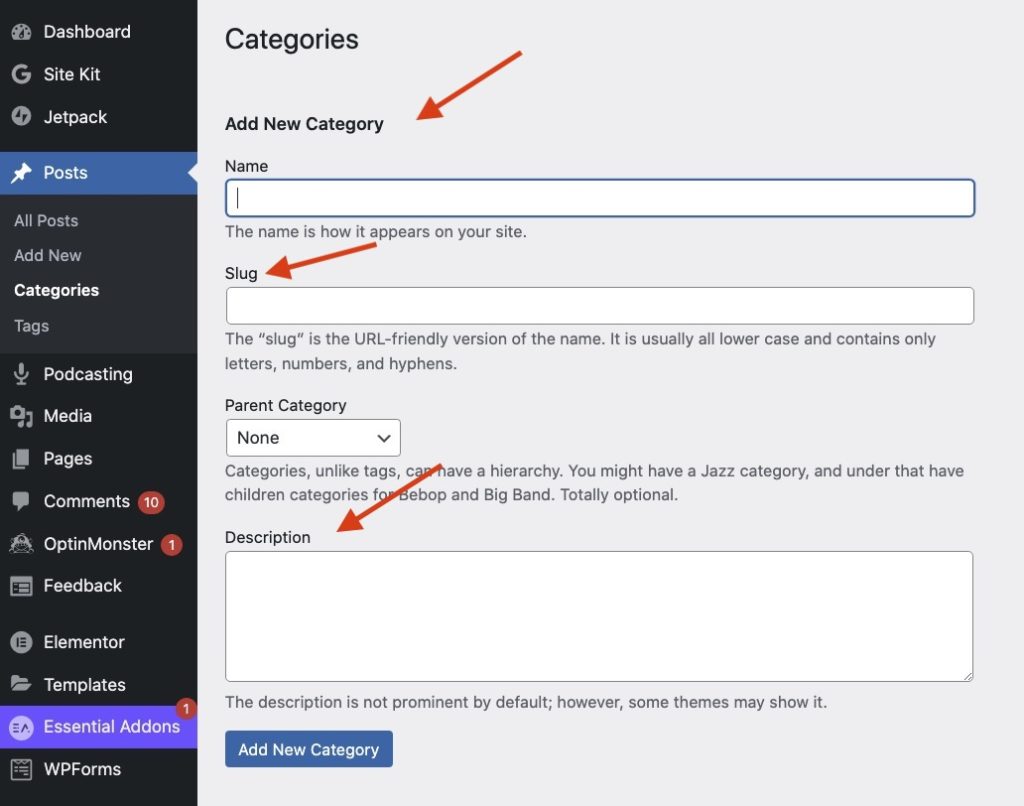
To create categories, on the left side of your screen, go to ‘Posts’ – ‘Categories’. Once inside, name your new category, add a slug, a description, and ‘Add New Category.”
Step 12 – Excerpt
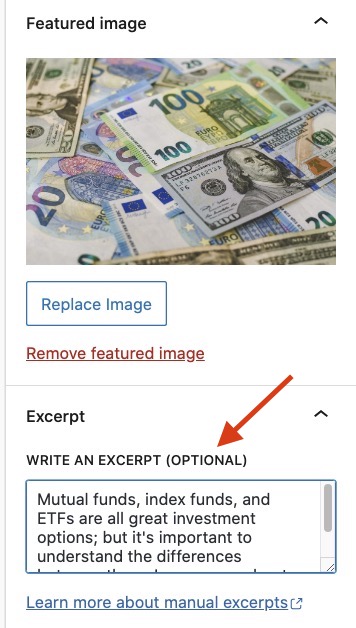
On the ‘Post’ tab, below ‘Featured Image’, you have ‘Excerpt’.

This sample hooks your readers and summarises your blog post.
It says ‘optional’ because if you don’t write an excerpt, WordPress will show a bit of the first paragraph of your article.
SEO Settings
This section focuses on Search Engine Optimisation and is located at the bottom of the page.
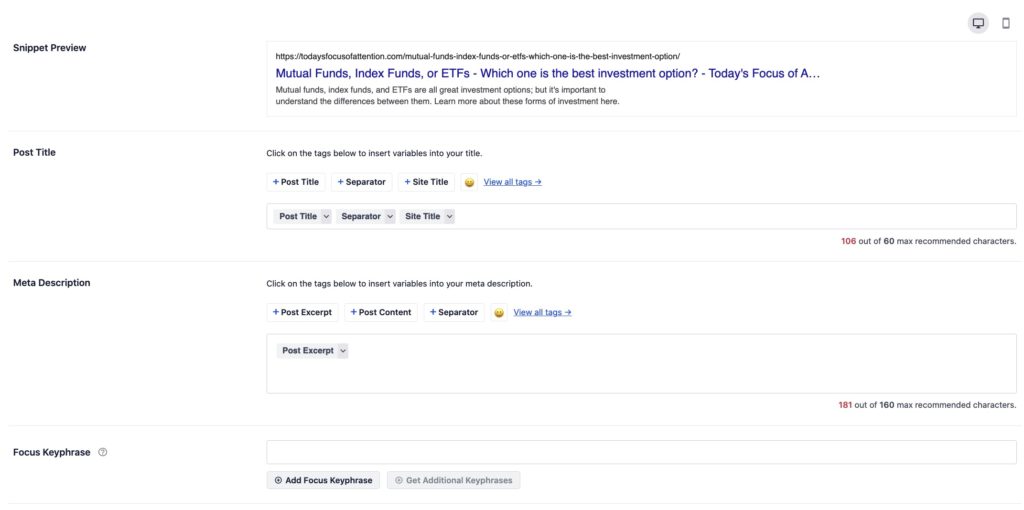
Snippet Preview shows you how your article looks – link, headline, and meta description. Whenever you modify something, you see the changes here.

Post Title refers to the Headline. WordPress recommends no more than 60 characters. Nevertheless, it’s up to you. Many websites go beyond that limit.
You may change the title here and keep the original one in your blog post.


Meta Description offers value and entices the reader. It is an abridgement of your content and includes a call to action. It is crucial for SEO. Include any relevant keywords here.


Focus Keyphrase is the search term to rank for in search engines. For instance, to be positioned for healthy diets, your keyphrase could be ‘healthy diets for men.’

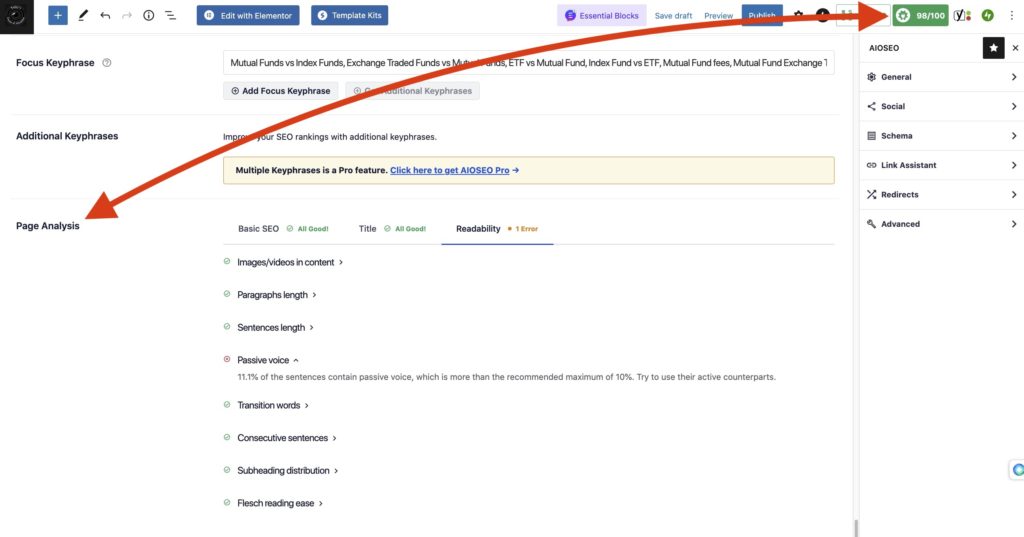
Page Analysis is a general overview of SEO.
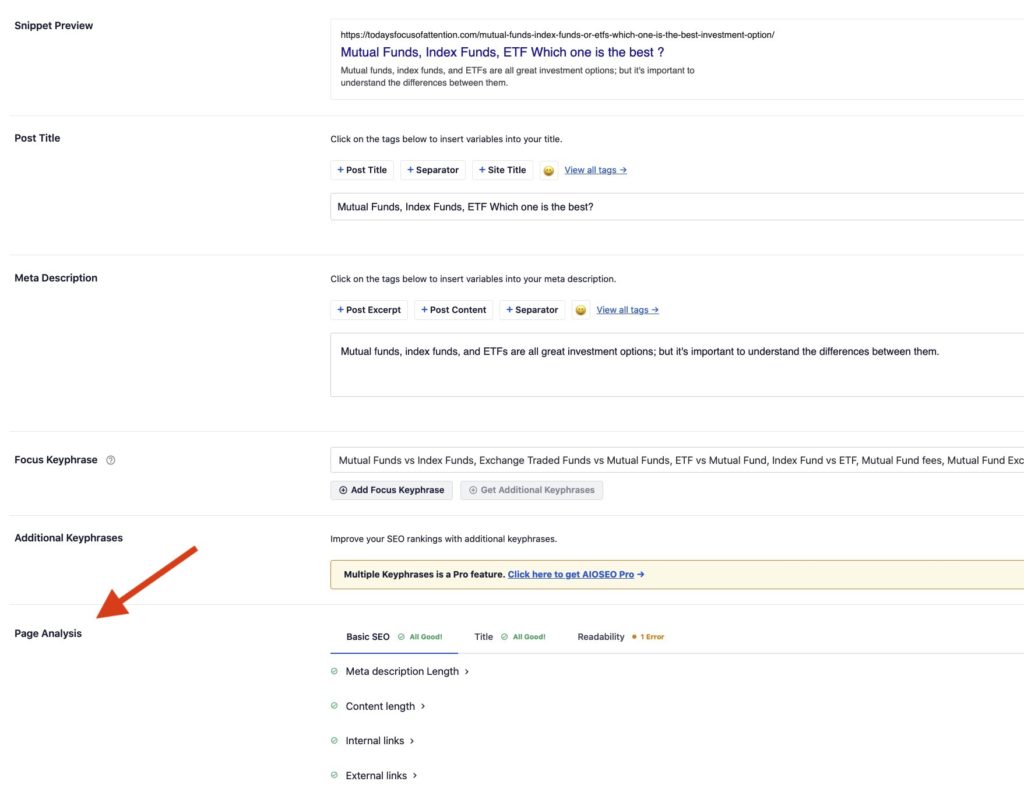
Basic SEO is about your Meta Description and Content Length, Internal and External Links.

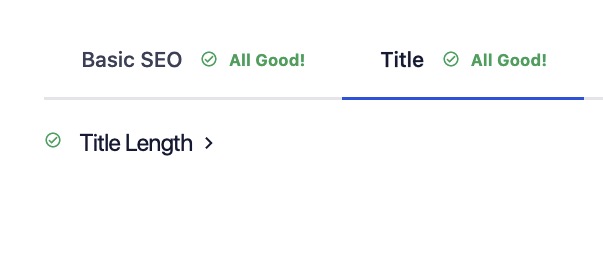
Title is merely referring to your title’s character count.
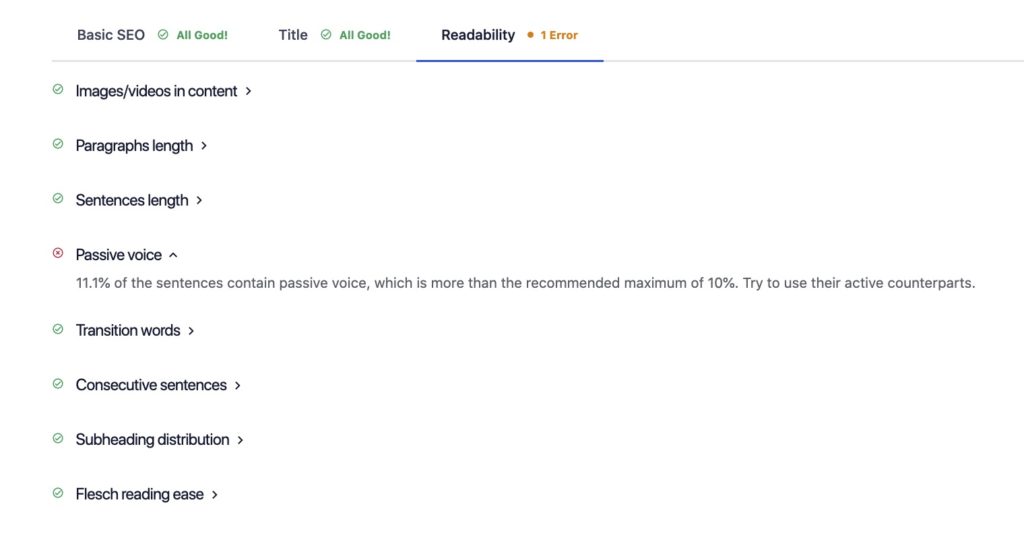
Readability analyses several factors based on SEO standards. Check them all.
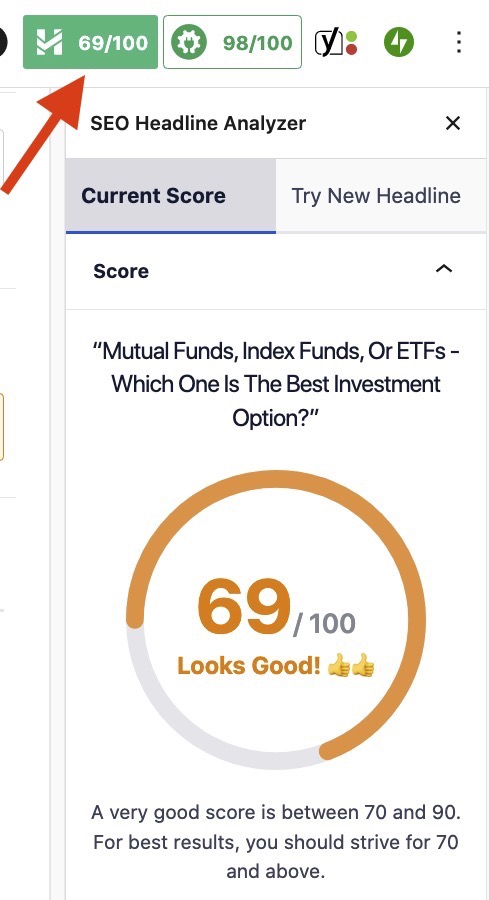
Pay attention to these indicators on the right: H69/100 and 98/100
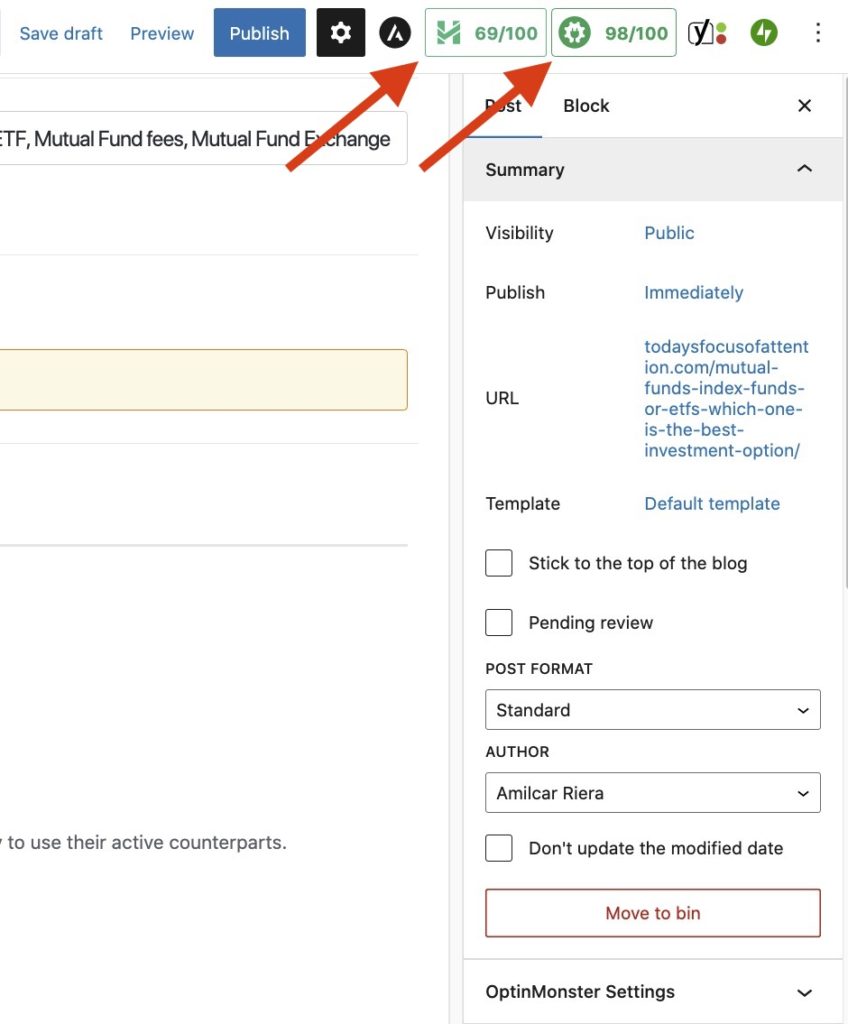
The first one refers to your headline. It basically tells you if your title has enough emotional weight, and if the headline may rank high in Google. The recommended score is in the range of 70 and 90.
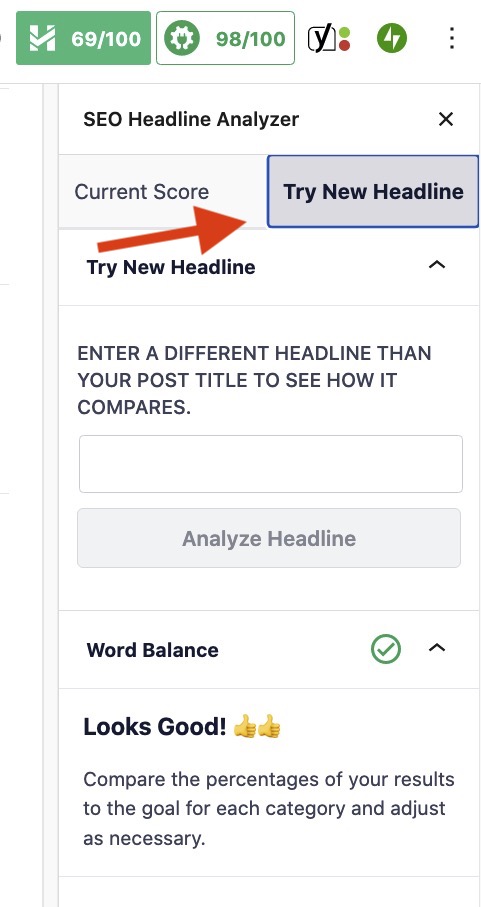
On the right tab, you have ‘Try New Headline’. Write another to get a higher mark.
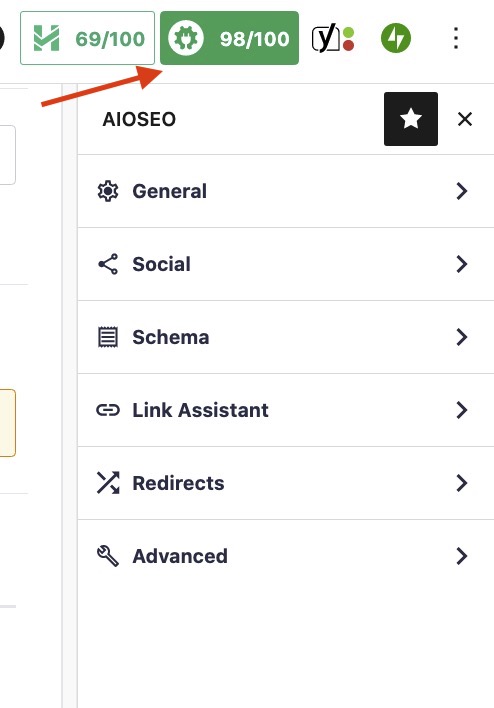
Next is the general SEO review, which is related to Page Analysis. If all the Page Analysis indicators show a green light, you will score 100/100 on this report.
Internal and External Links: Why Are They Important?
Internal Links help Google rank your website better. They direct your reader from one page on your website to another. At the same time, they increase rankings for other pages you own.
External Links on the other hand, indicate to search engines that your website is credible. They boost your trustworthiness, making your site and content relevant.
How to Create An Internal Or External Link?
Select a word or phrase, hit the chain symbol, and paste or type the link you want.


There are several types of ‘anchor texts’ when speaking of links. They are Exact Match, Partial Match, Branded Anchors, URL, or Misc.
Exact Match is when you refer to a keyword you are targeting. By way of example, to connect to a ‘publicity agency,’ you make this phrase your live link.
Partial Match is used in sentences such as ‘are you looking for a publicity agency for your company’, where ‘publicity agency for your company’ would be the hyperlink. A partial match is more natural than if you write a URL or mention a website.
When the full name of a brand or website is the anchor text, it is called Branded Anchors. They are super clear. You can make the Amazon word a link button.
With URLs, you use the complete URL as the link.
And Miscellaneous are words similar to ‘Read more’ or ‘Click here.’
Publish
This would be the last step.
When everything is ready, ‘Publish’ and witness the birth of your creation.
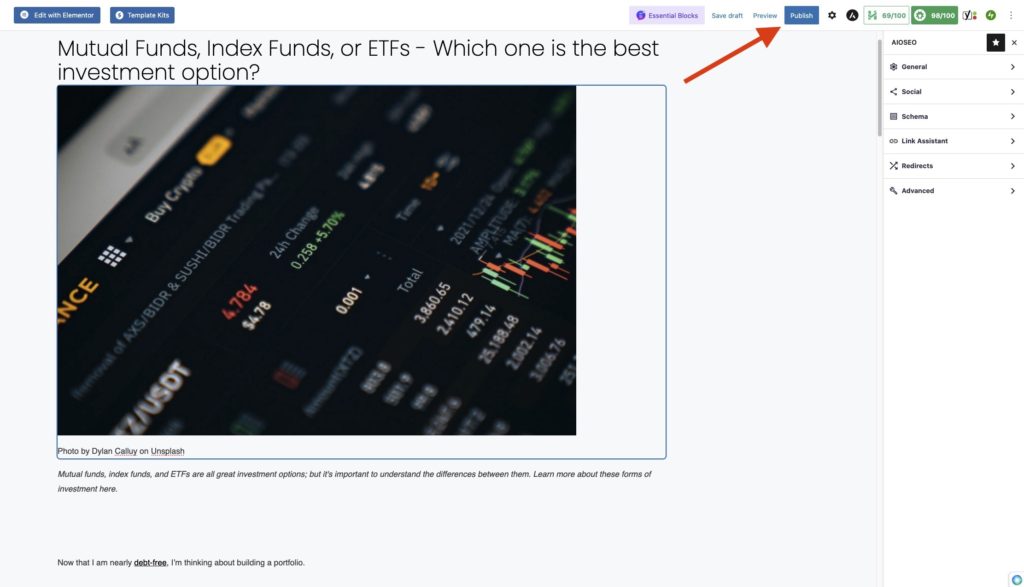
If not satisfied with the results, ‘Edit Post’ and make all the necessary changes.
‘Update’, ‘View Post’, and you’re done.

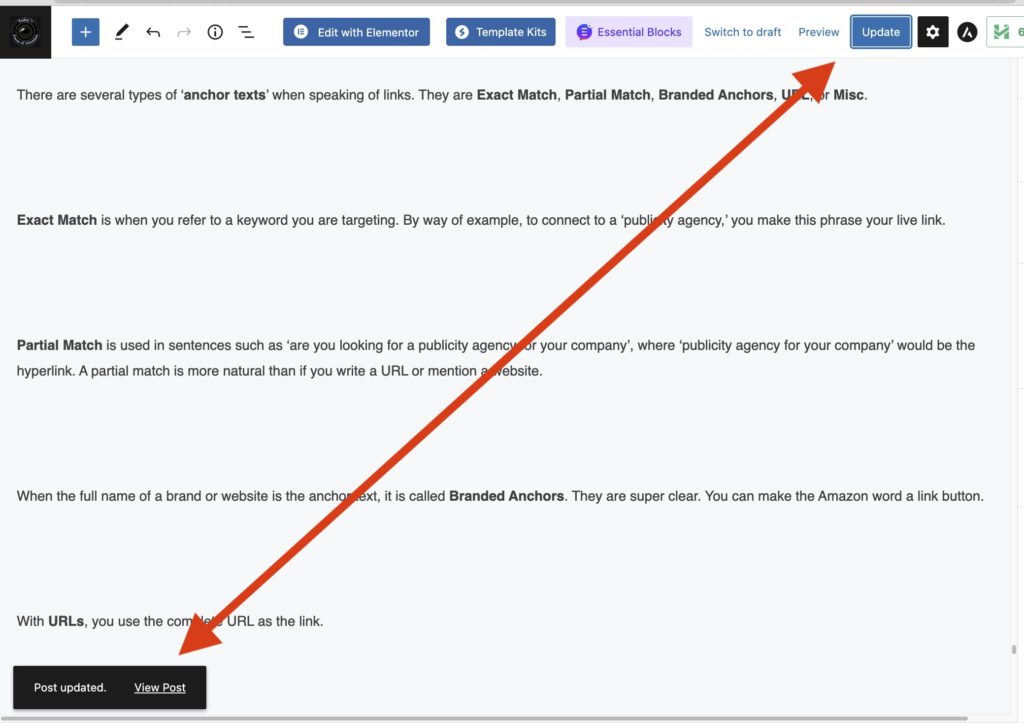
A week later, you can come back and add more information to your post, but remember to ‘Update’.
This is pretty straightforward. I follow these steps every time I publish articles on my website, although I sometimes change the order.
Why not start with the headline, content, and SEO and then add the tags, images, and separators afterwards? It’s a matter of taste and practice.
But the point is to do it many times until the lamb becomes a lion.
I hope you find this information useful. Please share your comments.


